You can make a sand casting mould by shaping special sand around a pattern, then removing the pattern to form a cavity. This process lets you create strong metal shapes at home with a few basic supplies. Here’s what you’ll need:
- Sand (with clay or binder)
- Water
- Pattern (object to copy)
- Flask (frame to hold sand)
- Riddle or sifter
- Wooden ramming tool
- Metal rods for vents
- Small brush
Don’t worry if you’re new to sand casting. You’ll pick it up quickly with a bit of practice!
Key Takeaways
- Choose the right sand and binder to make strong molds that hold their shape and let gases escape.
- Mix sand, clay, and water carefully to get the right moisture and strength for fewer defects.
- Use a flask and pack sand tightly around your pattern to create a detailed and stable mold.
- Add a sprue, riser, and vents to control metal flow and let gases escape for a better casting.
- Clean your mold well before pouring metal and always follow safety tips to protect yourself.
Sand Casting Materials
Sand Types
You have a few choices when it comes to sand for sand casting. The most common type is green sand. This sand uses bentonite clay and water as binders. Green sand works well because it holds its shape and lets gases escape. Research shows that using about 93% recycled sand with the right amount of bentonite and water gives you strong molds and fewer casting defects. You can also find chemically bonded sands, like those using phenolic resin. These sands create very strong and accurate molds, especially for complex shapes. When you pick your sand, look for these qualities:
- Permeability: Lets gases escape so your casting does not get bubbles.
- Strength: Holds its shape when you pack it around the pattern.
- Refractoriness: Stands up to high heat without breaking down.
Binders and Additives
Binders help the sand stick together. Bentonite clay is the most popular binder for green sand. It gives the sand good strength and helps it hold moisture. Chemically bonded sands use special resins, like phenolic-urethane, to glue the sand grains together. These resins make the mold very strong and stable, which is great for detailed work. Some additives can make your mold even better. For example, adding graphene oxide or polyvinyl alcohol can improve how well your mold stands up to freezing and thawing. Here’s a quick look at some additives and what they do:
| Additive/Binder | What It Does | Benefit |
|---|---|---|
| Bentonite Clay | Binds sand with water | Good strength, easy to use |
| Phenolic Resin | Chemically bonds sand | High strength, precise molds |
| Graphene Oxide | Improves freeze–thaw resistance | More durable molds |
| PVA | Reduces surface scaling | Longer-lasting molds |
Tools and Equipment
You do not need fancy tools to start sand casting, but the right equipment makes things easier and safer. You will use a flask to hold the sand, a riddle or sifter to break up lumps, and a wooden rammer to pack the sand tightly. Metal rods help you make vents for gases to escape. Studies show that using the right tools can cut defect rates by half and boost productivity by 20%. You will also save time and effort, making the whole process smoother. Here is a quick list of what you need:
- Flask (frame)
- Riddle or sifter
- Wooden rammer
- Metal rods
- Small brush
Tip: Keep your tools clean and organized. This helps you work faster and makes your molds turn out better.
Sand Preparation
Mixing Sand and Binder
Start by measuring your materials. For most sand casting projects, you want a ratio of about 100 parts silica sand to 6 parts bentonite clay by weight. This ratio gives you a strong, workable mix. Pour the dry sand into a large container. Sprinkle the bentonite clay evenly over the sand. Use your hands or a shovel to mix them together until the color looks even. This step helps the clay coat every grain of sand.
Now, slowly add water. Pour a little at a time and keep mixing. You want the sand to feel damp but not soggy. If you squeeze a handful and it holds its shape without crumbling or dripping, you have the right consistency. This careful mixing makes sure the binder spreads out, which helps your mold stay strong and hold details.
Tip: Always mix dry ingredients first. Add water last for the best results.
Moisture Adjustment
Getting the moisture just right is super important. If the sand is too dry, it will not stick together. If it is too wet, it will lose shape and cause defects in your casting. Most people find that adding water until the sand feels like damp brown sugar works best. Squeeze a ball of sand in your hand. If it keeps its shape and does not fall apart, you are on the right track.
Researchers have found that moisture content is the most important factor for good casting quality. When you get the moisture right, you reduce defects and scrap rates. The right amount of bentonite clay and water also makes your mold harder and stronger. This means your mold will hold up better when you pour in the hot metal.
Here are some key points about why moisture and binder matter:
- Moisture content, green strength, and mold hardness all affect the final casting.
- Too much or too little water changes how heat moves through the mold, which can cause problems.
- The right mix of sand, clay, and water gives you fewer defects and better results.
Sifting and Testing
After mixing, you need to sift the sand. Use a riddle or sand sifter to break up any lumps. This step makes the sand smooth and even. Spread the sand out and run it through the sifter. This helps you get a uniform texture, which is important for making a good mold.
Testing your sand is easy and important. Try the squeeze test: Grab a handful of sand and squeeze it. If it holds its shape and does not stick to your hand, you are ready to go. If it crumbles, add a bit more water. If it feels sticky or leaves wet marks, let it dry out a little.
Scientists use special tests to check if the sand mix is even. They look at things like particle size and how well the sand grains mix together. High-quality sand mixes have homogeneity indices above 90%, which means the sand is very uniform. Some foundries use advanced tools like laser diffraction or even AI to check the mix, but for home projects, your hands and eyes work just fine.
| Test Method | What It Checks | Good Result |
|---|---|---|
| Squeeze Test | Moisture & strength | Holds shape, not sticky |
| Sieve or Riddle | Evenness of texture | No lumps, smooth |
| Visual Inspection | Color & consistency | Even color, no dry spots |
Note: Good sand preparation means fewer casting defects and better results. Take your time with this step, and your sand casting molds will turn out great!
Flask and Pattern Setup
Flask Assembly
You need to start by putting together your flask. The flask is a sturdy frame that holds your sand in place while you work. Most flasks have two parts: the bottom (called the drag) and the top (called the cope). Place the drag on a flat surface. Make sure it sits steady and does not wobble. Some people use wooden flasks, while others use metal ones. Both work well for sand casting at home.
There are several ways to set up your flask, and each method has its own benefits:
- Bedding-in sand casting lets you fill the drag partway and pack sand around your pattern. This works well for simple, round shapes.
- False cope sand casting means you ram sand under the pattern, then add the cope on top. This helps you get smooth surfaces.
- Flat back sand casting puts the mold cavity on the drag side with a sprue, making it easier to join the cope and drag for more complex parts.
- Sodium silicate sand casting uses a special binder that hardens fast, so you can make detailed shapes.
- Vacuum sand casting uses a vacuum flask and plastic sheet to hold the sand tight. This gives you a very smooth finish.
- Shell sand casting uses resin-coated sand and heat to make a hard shell. This is great for making lots of detailed parts quickly.
Choose the method that fits your project best. For most beginners, bedding-in or flat back methods work well.
Pattern Placement
Now, place your pattern in the center of the drag. The pattern is the object you want to copy. Press it down gently so it sits flat. Leave some space around the edges for the sand. If your pattern has small details, make sure they face up. This helps you get a cleaner mold later. Double-check that your pattern does not touch the sides of the flask.
Applying Chalk Dust
Before you add sand, dust the pattern with chalk or talcum powder. This step helps the pattern release from the sand later. Use a small brush to spread a thin, even layer. Do not use too much. Just a light dusting will do the trick. This simple step can save you a lot of trouble when you remove the pattern.
Tip: Always keep your workspace tidy. A clean area helps you avoid mistakes and makes sand casting more fun!
Sand Packing
Packing Around Pattern
You have your flask ready and your pattern in place. Now, start adding sand to the flask. Sprinkle sand gently over the pattern. Use your fingers to push sand into small spaces and corners. This helps you capture every detail. When you fill the flask halfway, use a wooden rammer to press the sand down. Work slowly and pack the sand tightly. Tight packing keeps the mold strong and stops it from shifting.
Here’s a quick look at how different sand packing methods help your casting:
| Sand Packing Method | Key Advantages | Impact on Casting Quality |
|---|---|---|
| Bedding-in (Green Sand) | Tight packing of sand around the pattern to prevent mold deformation and shifting | Enhances mold strength and dimensional accuracy, reduces defects, and improves precision and reliability. |
| Vacuum Sand Casting | Use of vacuum to remove air and gases from mold cavity | Reduces porosity, shrinkage, and trapped gases; improves casting density, surface finish, and dimensional accuracy. |
| Sodium Silicate Sand Casting | Uses sodium silicate binder with rapid curing via chemical catalyst | Produces stronger molds less prone to deformation, enables high dimensional accuracy, tight tolerances, and superior surface finish. |
Tip: Always pack sand in layers. This gives you a stronger mold and better results.
Leveling and Compacting
After you fill the flask, use a straight edge or ruler to level the top. Scrape off extra sand so the surface is flat. Press down again with your rammer. Make sure the sand feels firm and does not move when you tap it. Good compaction makes your mold tough. It also helps the metal flow smoothly when you pour it later.
If you see any soft spots, add more sand and press again. You want the whole surface to feel even. This step helps you avoid cracks and weak spots in your sand casting mold.
Removing the Pattern
Now, it’s time to take out the pattern. Tap the pattern gently with a small hammer or mallet. Wiggle it a little to loosen it. Lift the pattern straight up and out. Move slowly so you do not break the mold. If some sand falls into the cavity, use a small brush to clean it out.
Note: If you dusted the pattern with chalk or powder, it should come out easily. Take your time and check for any broken edges.
You did it! Your mold is now ready for the next steps in sand casting.
Gating System
Sprue and Riser
You need to create a sprue and a riser in your mold. The sprue is the main channel where you pour the molten metal. The riser acts as a reservoir, feeding extra metal into the mold as it cools and shrinks. To make these, press a smooth rod or dowel straight down into the sand, next to your pattern. Make sure the sprue is wide enough for the metal to flow easily, but not so wide that it causes splashing.
A good gating system controls how fast the metal enters the mold. If the metal moves too quickly, it can splash, trap air, and create defects. Computer simulations show that traditional gating systems can push metal at speeds over 3 meters per second, which is too fast and causes problems. When you use an optimized design with a tapered sprue and smooth channels, you keep the metal speed around 0.3 to 0.35 meters per second. This helps you get a cleaner, stronger casting.
You can use modeling clay or wax to shape the sprue and riser before packing the sand. After you remove the pattern, carefully pull out the rods to leave open channels.
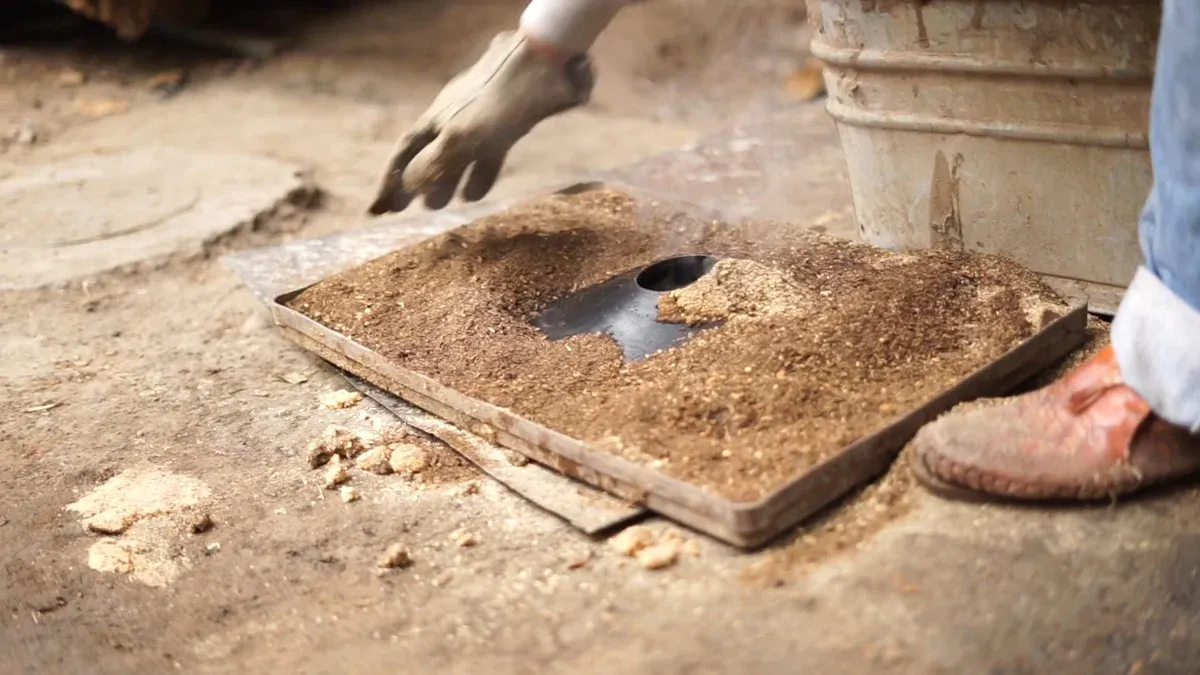
Vents
Vents let trapped air and gases escape from the mold. If you skip this step, you might see bubbles or holes in your finished piece. To make vents, poke thin metal rods or wires through the sand, reaching from the mold cavity to the outside. Place vents at high points or where you think gas might collect.
Empirical studies show that well-placed vents help control pressure inside the mold. Sensors inside test molds have measured pressure changes as metal flows in. When vents work well, pressure stays low and steady, which means fewer defects and better results.
Mold Cleaning
Before you pour the metal, always clean the mold cavity. Use a small brush to sweep away loose sand or dust. This step keeps your casting smooth and prevents flaws.
| Practice/Process | Description | Notes/Challenges |
|---|---|---|
| Dry attrition scrubbing | Scrubs sand to remove chemicals and resins. | Needs dust removal and heat treatment. |
| Shot blasting | Blasts sand and metal bits off castings. | Can change sand grain size; may leave some contamination. |
| Lump-breaking and screening | Breaks up and removes big chunks from used sand. | Good for partial reuse, not full cleaning. |
Tip: Always wear a dust mask and gloves when cleaning your mold. Deep cleaning helps protect your health and keeps your workspace safe. Industry reports say that cleaning up dust and sand before pouring metal lowers the risk of breathing in harmful particles.
You just learned how to make a mold step by step. First, you picked your materials and mixed the sand. Next, you set up the flask, packed the sand, and removed the pattern. You added the gating system and cleaned the mold. Anyone can do this with a little practice! Try making your own mold at home. When you feel ready, pour metal or troubleshoot your first project. Ready to create something amazing? Give it a shot!
FAQ
How do I know if my sand is mixed well enough?
Try the squeeze test. Grab a handful of sand and squeeze it. If it holds its shape and does not crumble or stick to your hand, you nailed it! If not, adjust the water or clay.
Can I reuse sand from old molds?
Yes, you can reuse sand. Break up the old sand, remove lumps, and sift it well. Add a bit more clay and water if it feels dry. Always check the sand with the squeeze test before using it again.
What if my mold breaks when I remove the pattern?
Don’t worry! This happens sometimes. Just pack the sand tighter next time and use a little more chalk dust on the pattern. If you see cracks, fix them with a small brush and some damp sand.
Do I need special safety gear for sand casting?
Yes, safety matters. Wear gloves, a dust mask, and safety glasses. Hot metal and fine sand can hurt you. Keep your workspace clean and always follow safety tips. Better safe than sorry!