You want to get better results from aluminum sand casting. First, check your pattern for problems. A smooth pattern helps you get fewer casting mistakes. Make sure your aluminum is clean before pouring it. Always pick the right pattern size for each aluminum sand casting. If you see rough edges, fix the pattern right away. Good aluminum sand casting needs a simple process and careful work. Watch every pattern closely, and you will get stronger castings.
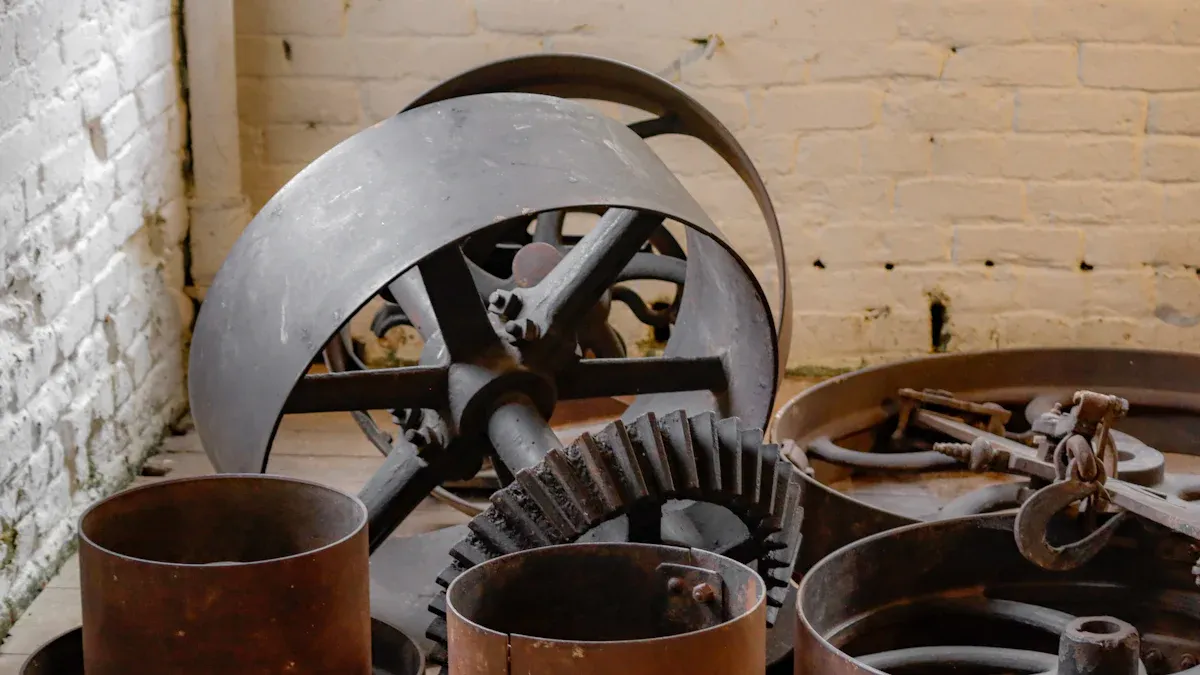
Optimizing Mold Design for Superior Aluminum Sand Casting Results
A great aluminum casting starts with smart design choices. You want to make sure your mold helps the metal flow smoothly and gives you strong, durable parts. Good aluminum casting design means fewer defects and better results every time you pour.
Pattern Accuracy for Consistent Castings
Your pattern is the heart of your aluminum sand casting process. If you want every casting to look the same, you need a pattern that matches your design exactly. Check your pattern for dents, cracks, or rough spots. Fix any problems before you start. Use the right material for your pattern so it lasts longer and keeps its shape. When you use a precise pattern, your aluminum molds will give you better results and help you avoid mistakes in your aluminum casting design.
Tip: Always store your pattern in a dry place. This keeps it from warping and helps you get more consistent castings.
Proper Draft Angles for Easy Pattern Removal
Draft angles make it easy to pull the pattern out of the mold. If you skip this step, you might damage the mold or the pattern. Add a small angle to the sides of your pattern. This helps the sand release cleanly when you lift the pattern out of the flask. Good draft angles also help you optimize wall thickness and keep your aluminum casting design simple. You will spend less time fixing broken molds and more time making quality castings.
Mold Ventilation Techniques
Air needs to escape when you pour hot metal into the mold. If air gets trapped, you might see bubbles or weak spots in your aluminum casting. Add small vents to your mold design. These vents let air out and help the metal fill every space. Good ventilation also helps you optimize wall thickness and avoid porosity. Place vents in the right spots around your flask and pattern. This step makes your aluminum casting design stronger and more reliable for manufacturing.
Remember: Careful mold design leads to better aluminum sand casting and fewer problems with your metal parts.
Sand and Binder Selection
Choosing the right sand and binder can make or break your aluminum casting results. You want molds that hold their shape, let air escape, and give you a smooth finish. Let’s look at your options and see how you can get the best out of your aluminum sand casting process.
Different Types of Sand Used in Aluminum Sand Casting
You have a few main types of sand to pick from. Green sand is the most common. It uses clay and water as a binder. This sand is easy to shape and works well for most aluminum casting jobs. Oil-based sand gives you a smoother surface and better detail. You might use it when you need a really clean finish. Some shops use resin-bonded sand for special shapes or big parts. Each type of sand has its own strengths. You should match the sand to your casting design and the kind of part you want to make.
Tip: Always test a small batch of sand before you start a big manufacturing run. This helps you spot problems early.
Understanding and Selecting the Right Grain Size for Aluminum Sand Casting
Sand grain size matters more than you think. Fine grains give you a smooth surface, but they can trap gases. Coarse grains let air out, but the surface might look rough. You need to balance these two things. For most aluminum casting, medium grain sand works best. It gives you good strength and lets gases escape. Always check your casting design and consider alloy selection when picking your sand grain size.
| Grain Size | Surface Finish | Gas Escape | Best Use |
|---|---|---|---|
| Fine | Smooth | Low | Small, detailed parts |
| Medium | Good | Medium | Most aluminum castings |
| Coarse | Rough | High | Large, simple castings |
Choosing the Right Binders for Aluminum Casting Success
Binders hold your sand together. Clay is the classic choice for green sand. Oil binders give you a stronger mold and a better finish. Resin binders work for tricky shapes or when you need extra strength. The binder you pick affects how easy the mold is to handle and how strong it stays during pouring. Always match your binder to your casting design and the type of aluminum you use. If you want fewer defects, make sure your binder mixes well with your sand.
Remember: The right sand and binder combo helps you get better aluminum casting results every time.
Steps for Mold Preparation in Aluminum Sand Casting

Getting your mold ready is a big step in the aluminum sand casting process. If you want precise parts, you need to follow a few simple steps. Let’s walk through the best practices for mold preparation so you can avoid common mistakes and get better results every time.
Sand Compaction Best Practices
You want your sand to be packed just right. If you press too hard, the sand can crack. If you press too soft, the mold might fall apart. Use steady pressure and make sure the sand fills every corner of the flask. Try tapping the sides of the flask to help the sand settle. Always check the surface for soft spots before you move to the next step.
Tip: Use a simple tool like a wooden rammer to get even compaction. This helps your process stay consistent.
Effective Venting to Prevent Defects
Air needs a way out when you pour the metal. If you skip venting, you might see bubbles or weak spots in your castings. Use a thin rod or wire to poke small holes through the sand. Place these vents near thick sections and corners. Good venting keeps your process smooth and helps you make stronger, cleaner parts.
Moisture Control Tips
Too much water in your sand can ruin the process. If the sand feels sticky or clumps together, it has too much moisture. If it falls apart, it needs more water. You want the sand to hold its shape but not feel wet. Test a small handful before you start. Adjust the water until the sand packs well and breaks cleanly.
Note: Accurate sand core placement and high permeability help you get the best results. Always double-check your setup before pouring.
Gating and Riser Design for Aluminum Sand Casting
Designing your gating and riser system is a big step in aluminum casting. If you want smooth pours and strong parts, you need to plan how the metal moves through your mold. Good design helps you avoid waste and get complete fills every time you work with sand casting aluminum.
You want your gating system to guide the metal into the mold without causing turbulence. Turbulence can trap air and make defects in your casting. Use straight, wide channels for the metal to flow. Keep the gates short and direct. This design helps the metal fill the mold fast and evenly. Try to avoid sharp turns or sudden changes in direction. If you keep your gating simple, you will see fewer problems in your aluminum casting design.
Tip: Place your gates away from thin sections. This helps you avoid cold shuts and weak spots in your casting.
Risers act like reservoirs for molten metal. They feed the casting as it cools and shrinks. You want to place risers at the thickest parts of your design. This keeps those areas full of metal as the rest of the casting solidifies. Make sure your risers are big enough to hold extra metal but not so big that they waste material. A good riser design means you get fewer shrinkage defects and stronger aluminum casting results.
Here’s a quick table to help you remember where to put risers:
| Riser Placement | Best For |
|---|---|
| Thick sections | Preventing shrinkage |
| High points | Easy riser removal |
| Near gates | Smooth metal feeding |
You want the metal to flow smoothly from the pour to every part of the mold. If the flow is too fast, it can erode the sand and cause defects. If it’s too slow, the metal might cool before filling the mold. Watch your pours and adjust your gating and riser design as needed. Good metal flow means fewer defects and better aluminum casting every time. Always check your aluminum casting design after each manufacturing run to see where you can improve.
Remember: Careful planning of your gating and riser system leads to better casting and less waste.
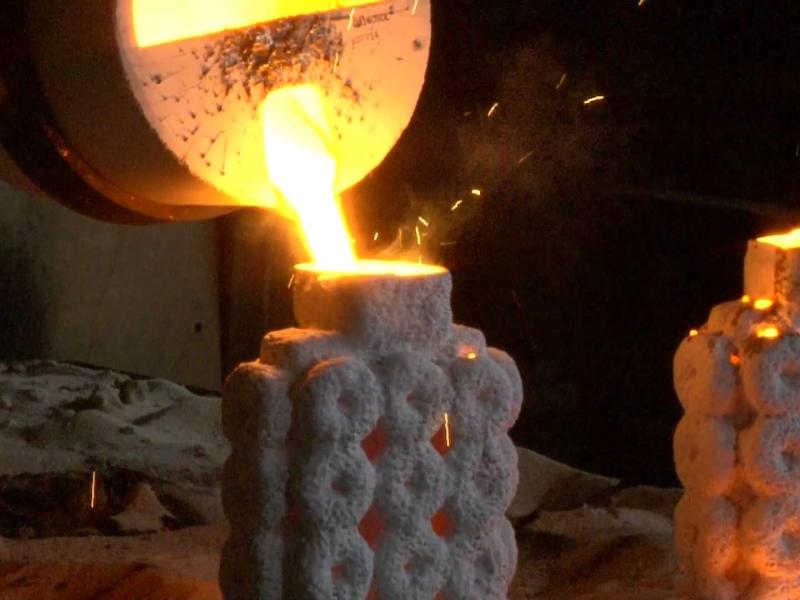
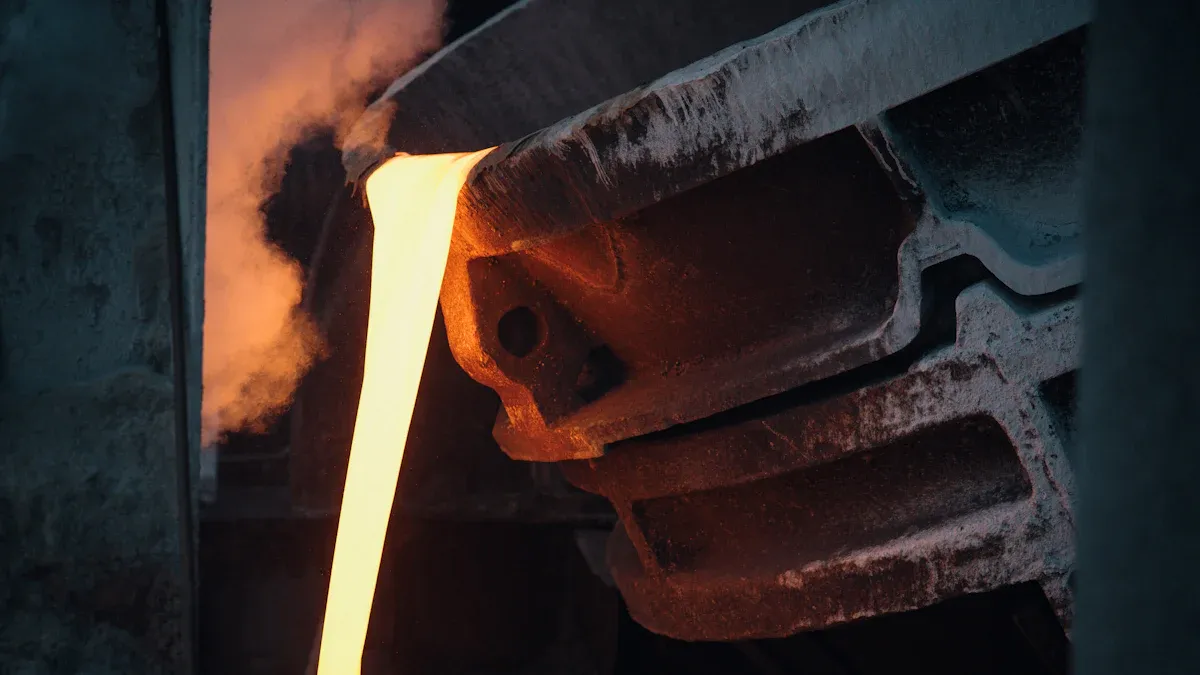
Pouring Techniques for Quality Aluminum Castings
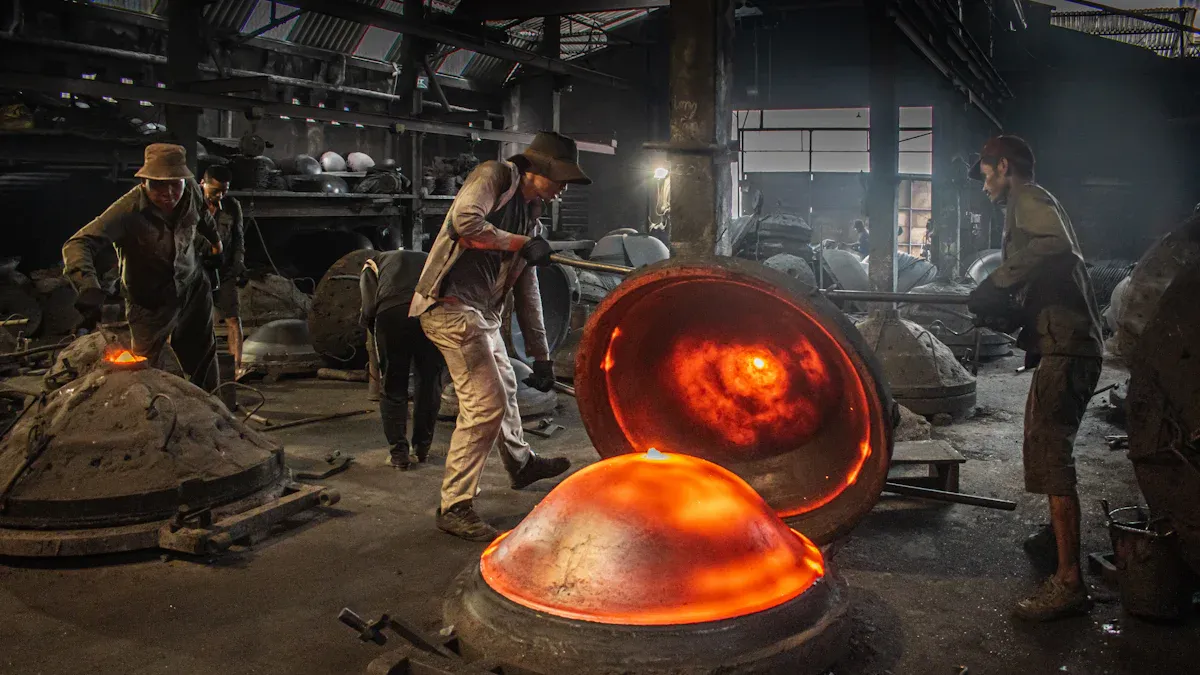
When you pour metal, you control the quality of your aluminum casting. The right pouring techniques help you avoid common problems and get strong, clean parts every time. Let’s look at the best ways to pour for top results.
You need to heat the aluminum to the right temperature before pouring. If the metal is too hot, it can damage your mold and cause rough surfaces. If it is too cold, the metal might not fill the mold. For most aluminum casting, aim for a temperature between 1300°F and 1400°F. Use a thermometer to check. Always melt the aluminum in a clean crucible. This keeps your casting free from dirt and oxides.
Tip: Preheat your mold a little before pouring. This helps the metal flow better and reduces thermal shock.
You want to pour at a steady speed. Pouring too fast can cause turbulence. This can trap air and make defects in your casting. Pouring too slow can let the metal cool too soon. Try to keep a smooth, even flow. Hold the ladle close to the mold opening. This helps you control the stream and fill the mold with less splashing.
Here’s a quick checklist for pouring speed:
- Steady, not rushed
- No splashing
- Fill the mold evenly
You can avoid many defects by keeping your aluminum clean and your mold in good shape. Skim off any dross or dirt from the top of the molten metal before you pour. Check your mold for cracks or loose sand. Make sure your design has good vents and gates. This lets air escape and helps the metal fill every part of the casting. Always inspect your finished casting for signs of porosity or cold shuts. If you see problems, adjust your pouring technique or mold design next time.
Remember: Clean metal and careful pouring give you the best aluminum casting results.
Cooling and Solidification Control in Aluminum Sand Casting
When you want strong and durable parts from your aluminum sand casting process, you need to pay close attention to how your metal cools and solidifies. If you control this step, you can avoid many common problems and get better results for high-performance applications.
The speed at which your aluminum cools makes a big difference. If the metal cools too quickly, it can crack or form weak spots. If it cools too slowly, you might see large grains or rough surfaces. You want a steady cooling rate. Try to keep your molds at a consistent temperature. Use sand with the right thickness and density. This helps the heat leave the metal at the right speed.
Tip: Place your molds in a spot with good airflow. This helps you control the cooling rate and get smoother castings.
Aluminum shrinks as it cools. If you do not plan for this, your casting can end up with holes or dents. Always add risers to your mold. Risers feed extra metal into the casting as it shrinks. Check your design and make sure thick sections have enough support. You can use a simple table to remember where shrinkage happens most:
| Area | Shrinkage Risk |
|---|---|
| Thick sections | High |
| Thin sections | Low |
| Corners | Medium |
Hot tears look like cracks in your finished part. They happen when the metal pulls apart as it cools. To stop hot tears, keep your mold design simple. Avoid sharp corners and sudden changes in thickness. Make sure the metal can move a little as it cools. If you see hot tears, try changing your cooling rate or adjusting your mold shape.
Remember: Careful cooling and solidification control help you make strong, reliable aluminum parts for any project.
Finishing Techniques for Quality Aluminum Castings
You have poured your metal and let it cool. Now, you need to finish your part. Good finishing makes your work look better and last longer. Let’s walk through the best practices for cleaning, fettling, and inspecting your castings.
Start by removing any loose sand from your part. You can use a wire brush or compressed air. Sometimes, a simple rinse with water helps. Make sure you get into all the small spaces. If you leave sand behind, it can scratch the surface or cause problems later. For tough spots, try a soft hammer or a small chisel. Always wear gloves and safety glasses when you clean. This step gets your part ready for surface finishing.
Tip: Clean parts are easier to inspect and finish. Take your time with this step.
Fettling means cutting off extra metal from your part. You might see bits of metal where the mold joined together. Use a file, grinder, or saw to remove these. Work slowly and check your progress often. If you rush, you can damage the surface. High-quality tools make this job easier and give you a smoother finish. Good fettling helps your part fit better in its final use.
- Use a file for small areas.
- Try a grinder for bigger pieces.
- Always check your work as you go.
Now, look over your part. Check for cracks, holes, or rough spots. Run your hand over the surface to feel for bumps. Use a flashlight to see inside small spaces. If you find a problem, fix it before you move on. Inspection helps you catch mistakes early. This step is important for quality in any manufacturing process.
Remember: Careful inspection means fewer problems later and happier customers.
You now have a toolbox full of proven ways to boost your aluminum sand casting results.
- Check your patterns and molds for accuracy.
- Pick the right sand and binder.
- Use smart gating, pouring, and cooling steps.
- Finish and inspect every part with care.
Keep learning and tweaking your process. Small changes can lead to big improvements. Your attention to detail will set your castings apart!
FAQ
What is the best sand for aluminum casting?
You get great results with green sand. It is easy to shape and works for most jobs. If you want a smoother finish, try oil-based sand. Always match your sand to your project needs.
How do I stop porosity in my castings?
You can reduce porosity by using clean aluminum and making sure your mold has good vents. Pour at the right temperature. Check your gating system for smooth metal flow. These steps help you get solid, strong parts.
Why did my casting crack after cooling?
Cracks often happen when the metal cools too fast or the mold design has sharp corners. Try to control your cooling rate. Use simple shapes and avoid sudden changes in thickness. This helps prevent hot tears and cracks.
Do I need special tools for finishing aluminum castings?
You do not need fancy tools. A file, grinder, and wire brush work well for most jobs. Always wear gloves and safety glasses. Clean and inspect your part after finishing to make sure it looks and works right.